Showing posts with label sewing. Show all posts

Friday, September 7, 2012

instafriday linkup


this week in pictures:


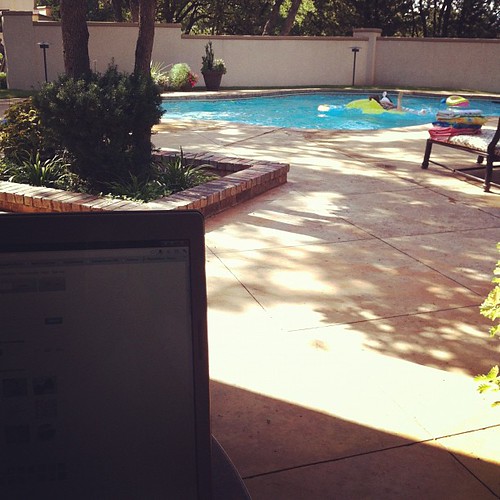
this is my office today... :)


Labor Day weekend at my in-laws house, aka My Favorite Resort With Amazing Food and Free Childcare.


this is the life... :)


I didn't work the whole time.  :)


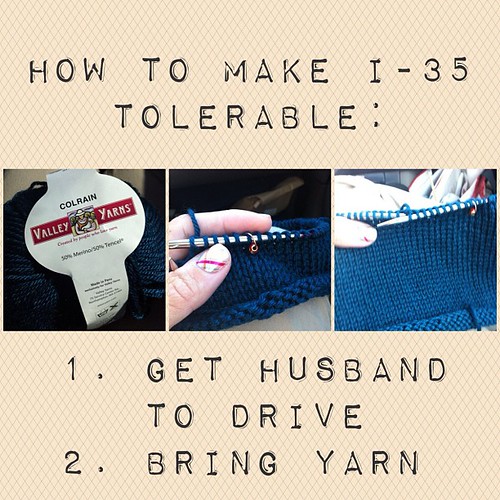
#knitting #picframe


Playing with yarn and PicFrame on the way home.  
(btw: this was my first time working with Colrain and it was simply divine!)


lunchbox note ideas

Back to school: lunchbox notes.  
(This is Mr. Happy Heart.  You'll hear more about him later.)


3 thread ultra stretch mock safety stitch serger

sewing...sewing...sewing
New stuff for the shop!


Trying not to get pasta on the computer.


reusable snack bags

Working within my advertising budget of $0.00!


What have you been up to this week?


life rearranged


post signature


Pin It!

Thursday, July 12, 2012

little pattern weights

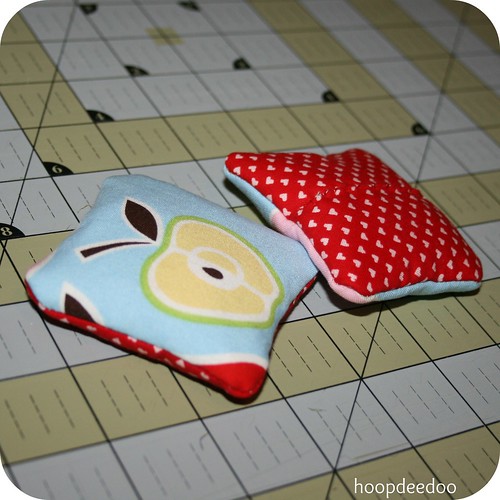
I used up some favorite scraps the other day to make some cute little weights.  I needed them to help hold down fabric while it's being cut, hold templates in place, etc.


weights1

{fabric: alexander henry apples and pears, unidentified heart print scraps, fusible fleece}

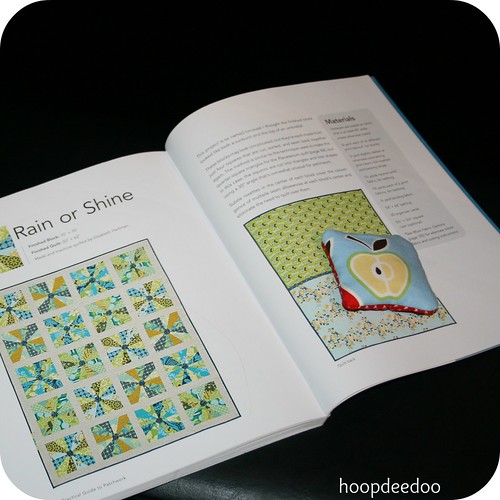
This is definitely one of those patterns where you don't really need a pattern, just an idea, and I must give credit where credit is due: Oh Fransson (aka Elizabeth Hartman).  I love the blog, and her book The Practical Guide to Modern Patchwork.  Practical?  So very HoopDeeDoo.

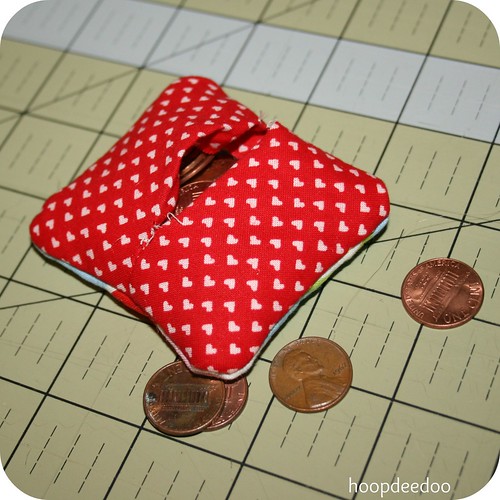
To fill the weights, first I tried to use those glass flat-bottom marble thingies you use in home decor, because I have a lot of them for some reason.  They aren't heavy enough.  So I went with the pennies.

weights2


It strikes me as a little sad that pennies are not worth enough as currency to buy something and are now essentially filler.  Poor Abe Lincoln.  Don't take it personally.


weights3

And they do an excellent job of  holding the aforementioned book open to the pattern I've chosen for that lovely fabric you saw the other day. :)

{find the tutorial here.}

post signature
Pin It!

Tuesday, April 17, 2012

Sewing Tips I Learned The Hard Way, All In One Day, Actually.

Public Service Announcement:

1.  Always wear shoes when sewing.  That way when you knock over a box of straight pins, you won't get half of them stuck in your feet when you are trying to clean them up.

2.  Pre-clean your sewing room floor before vacuuming.  Lint rollers can be helpful.  Vacuums do not like long threads.  And vacuum repair and brush replacement is pretty pricey.  (So I'm told.)

3.  Slow down when serging.  Although it feels pretty cool to use the serger at top speed, it does a better job of transitioning across existing seams if you slow down a bit.  Hitting a bump at top speed can break your thread, or worse, your needle.

4.  Glasses are not only super hot, but they protect your eyes from flying needles.  Um. yeah.

Now I'm going to go find a box of band-aids to keep in here.  Just in case.


post signature
Pin It!

Tuesday, May 24, 2011

{tip Tuesday}: the sewing tool that's not a sewing tool

Have you ever seen one of these?

cleaning rod


It's not really a sewing tool. It's for cleaning out a musical instrument, namely a flute. Like so:

cleaning rod

Naturally, I had this thing already hanging around, because I use it to clean my flute.  Indispensable.

As a sewing tool, though, it's a luxury I no longer can live without. I abhor using a safety pin to thread something through a casing. Ugh! Takes forever. This takes a few seconds.

Also handy for threading a camera strap through a cover. :)

cleaning rod

Your local music store will stock a metal cleaning rod for a few bucks, or a wooden one like mine for a few more. Metal rods are skinnier. Find one online here.

Trust me on this one. You'll wonder how you lived without it, especially if you make a lot of elastic waistbands or aprons with really long casings!!

linked up:


Tip Junkie handmade projects
Pin It!

Tuesday, April 26, 2011

{tip Tuesday} : flower headbands

I love all of the cute flower headbands for little girls these days, and my girls look great in them.


But headbands are notoriously cheapo. And little girls are not always gentle.

"mommy! I broke my headband!" (weeping and gnashing of teeth)

"not again!!! I just paid x dollars for that!!" (weeping and gnashing of teeth)

Here's my solution:


The flowers slide on and off! I made these flowers myself (see tutorial here) and added a small tube to the underside. Presto!

"mommy! I broke my headband!" (weeping and gnashing of teeth)

"no problem, honey!" (supermom grabs new headband from stash, slides flowers on it, and tosses the busted one)

Incidentally, the hem of an old t-shirt just happens to be the perfect size for these 1/2" wide headbands...

Another bonus is that this makes the flowers interchangeable, repositionable, etc. Let me know if you try it!


Tip Junkie handmade projects

Pin It!

Friday, March 11, 2011

hoodie upcycle part trois: camera strap cover!

I've been making camera strap covers for a while now.  I didn't invent them, I just put my own spin on them based on recommendations from my fabulous friend Jen, and adding my love of strip piecing.


Anyhoo, the camera strap covers have been a popular item, and I've sold the one off my camera 5 times.

Time to make another, one which I will NOT sell.

Beloved hoodie, thou hast new life. 


I think I may have stumbled onto greatness here.  There is NOTHING cushier on a neck than an old sweatshirt.


I added some cute raw-edge appliques and lined it with fusible fleece for even more padding.

 
Pardon the picture quality, but I had to use my phone for the pics.  Because I totally put this on my real camera as soon as it was done.  And it isn't coming off.
 
Well, unless someone wants to pay me $200 for it or something.
 
 
Pin It!

Friday, February 18, 2011

This just in: Boring hoodie transformed into cute makeup bag!


In spite of my compulsive Goodwill donations, I keep a box of old clothes to cut up for projects.  For some things, it's just wonderful to sew with fabric that is already perfectly broken in.  And sometimes an item is stained or un-donatable in some way, but a good source for scraps.

I loved this gray hoodie; I've probably had it for 10 years.  Haven't worn it in a long time, though; it just seems too short now.  (weight gain?  low rise jeans?  who knows.)  It needed a new life.


The beauty of refashioning zippered clothes is not having to sew in a zipper!  Wanna try it?  This is an easy project and won't take you long.


1.  With the zipper closed, cut the front out of the sweatshirt.  I only cut as far as the kangaroo pocket, but that's just me.  You can cut this to whatever size you like, as long as both sides are the same.  Using a pair of very small, sharp scissors, carefully cut between the teeth of the zipper.


2.  Use a safety pin at the bottom of the zipper to guard against accidentally opening it all the way.  You can hot glue the end of the zipper to make a new stop, or sew it shut.  I opted for glue.


3.  Cut two pieces of fusible fleece and two pieces of lining fabric the same size as your outer panels.  Fuse the fleece to the wrong sides of the outer panels.


4.  On your lining panel pieces, fold over the edge you will be attaching to the zipper and press.  I used a 3/8" seam allowance.


5.  Put the zipper foot on your machine.  Making sure your outer panels are out of the way, sew the folded edge of the lining panel to the underside of the zipper tape only.  Do this for both sides.


6.  Open the zipper 3/4 of the way (very important!)  With outer panels right sides together, sew around the edges.  Get as close as you can to the zipper without actually sewing over it.  Do the same with the lining panels, only use a 1/8" greater seam allowance, and leave several inches open on one side for turning. 

7.  Remove the safety pin.  Clip corners 45 degrees and trim seam allowances; turn right side out and press.  Stitch opening closed.


8.  Ta-da!  Your basic zip pouch.  Only...it's kinda boring.


9.  Aaahhh, that's better!  I added a fabric flower with button embellishment, and used a piece of the hoodie tie as a zipper pull.

 Now I can enjoy my comfy old hoodie in its new life as a makeup bag!

Materials list:
old zip hoodie
fusible fleece
cotton lining fabric
zipper foot
fabric scraps for flower
button
cording from hoodie tie
thread and stuff

Linked up here:


Join  us Saturdays at tatertotsandjello.com for the weekend wrap 
 up           party!
 
also linked up at: DIY Home Sweet Home Project
Pin It!

Saturday, February 12, 2011

5 minute gift card holder tutorial. no lie.

ever buy one of those gift cards that doesn't come with a cute envelope?

and it's really a pretty nice gift but you feel kinda lame just sticking it in the card, like you didn't try at all?

and you've only got a few minutes until the mailman swings by and you HAVE to get it out today?

(this is a purely fictional scenario, of course.)

problem solved.  Fire up your iron, thread the machine, and this should only take you 5 minutes.


1.  grab a scrap of cute fabric.  Fold it over; center your gift card as a guide, leaving  1/2" around 3 sides and an inch at the top.  Cut!


2.  Open it up flat.  Turn under and press your top seam; sew with 3/8" seam allowance.


3.  Fold with right sides together; sew  with 3/8" seam allowance along both raw edges.  Clip the corner 45 degrees.


4.  Turn right side out; press.  Slip in the gift card (I left mine peeking out for the picture, but it should fit all the way in the pocket.)  That's it!  Nice and flat and easy to mail. 

Now run for the mailbox!

{please excuse the less than professional pictures.  5 minutes, y'all.}

Pin It!

Saturday, October 9, 2010

"Creativity is not a pretty sight."


Horrific pile, eh?  My mom is visiting, but when she saw my office, she was not surprised.

Because when I was a teenager, I had a Garfield sign on my bedroom door that said, "Creativity is not a pretty sight."  I used this as an excuse for all kinds of horrific clutter in my room, which truly was either debris from creative activities, or a general lack of cleanliness because I was so busy being creative I didn't have time to clean.

Nothing has changed.  ;)  Everything in my sewing room has to coexist with my musical instruments, so they all kind of mingle.  I drape lots of things over my music stand, like these camera strap covers waiting for fleece innards.


I'm getting ready for my only craft show for the fall, a fundraiser for my kiddo's preschool.  Last year I kind of stumbled into this thing because a friend asked me, then she had to back out at the last minute due to childcare issues.  So I just did the best I could, with really low expectations, and rather low inventory as well.  And it went AWESOME.  So I'm back. 

I actually didn't sign up for the show by the deadline.  I didn't want to commit because my dad was so sick.  But they called anyways, the day after the funeral.  And well...I might not be ready for it, but you know, life is short.  So why the heck not?  If I don't have a lot of inventory, I'll just take custom orders like last year.


Besides, hand-binding table runners and knitting hats is a great way to pass the time while I watch the kids play!
Pin It!
Related Posts with Thumbnails