Showing posts with label link party. Show all posts

Tuesday, May 24, 2011

{tip Tuesday}: the sewing tool that's not a sewing tool

Have you ever seen one of these?

cleaning rod


It's not really a sewing tool. It's for cleaning out a musical instrument, namely a flute. Like so:

cleaning rod

Naturally, I had this thing already hanging around, because I use it to clean my flute.  Indispensable.

As a sewing tool, though, it's a luxury I no longer can live without. I abhor using a safety pin to thread something through a casing. Ugh! Takes forever. This takes a few seconds.

Also handy for threading a camera strap through a cover. :)

cleaning rod

Your local music store will stock a metal cleaning rod for a few bucks, or a wooden one like mine for a few more. Metal rods are skinnier. Find one online here.

Trust me on this one. You'll wonder how you lived without it, especially if you make a lot of elastic waistbands or aprons with really long casings!!

linked up:


Tip Junkie handmade projects
Pin It!

Tuesday, April 26, 2011

{tip Tuesday} : flower headbands

I love all of the cute flower headbands for little girls these days, and my girls look great in them.


But headbands are notoriously cheapo. And little girls are not always gentle.

"mommy! I broke my headband!" (weeping and gnashing of teeth)

"not again!!! I just paid x dollars for that!!" (weeping and gnashing of teeth)

Here's my solution:


The flowers slide on and off! I made these flowers myself (see tutorial here) and added a small tube to the underside. Presto!

"mommy! I broke my headband!" (weeping and gnashing of teeth)

"no problem, honey!" (supermom grabs new headband from stash, slides flowers on it, and tosses the busted one)

Incidentally, the hem of an old t-shirt just happens to be the perfect size for these 1/2" wide headbands...

Another bonus is that this makes the flowers interchangeable, repositionable, etc. Let me know if you try it!


Tip Junkie handmade projects

Pin It!

Friday, April 8, 2011

I SHINE - a donation challenge!

Hey hoopdeedoodles!  It's been a wild week of Ultimate Blog Partyin'!  I have visited so many cool blogs, participated in several whirlwind Twitter chats, and met lots of new people.  If you haven't seen the full list of participants, brace yourself and click here.

I've also been feeling totally overwhelmed by the amount of clutter in my house.  I suspect that it's breeding at night while I am sleeping.
So when I saw The SHINE Project blog's weekly challenge, I was already feeling highly motivated.

Y'all know what a big fan of Goodwill I am.

I had a major Goodwill pile going in the closet already, but it was the hardest kind of stuff to part with.

Stuff I like.


Stuff I just don't fit in anymore (because I lost weight: now don't get all jealous and stuff, I had to break up with sugar to lose that weight.  We barely speak anymore.  It's too painful.)

Stuff that's really nice (say like Cousin Eddie from National Lampoon's Christmas Vacation).

A Talbot's silk dress.  Michael Kors blouse.  Two Ann Taylor cashmere twinsets.  Etc. etc. etc. ad luxuriam.

I could give these things to friends, or consign them, but decided against it.

Some woman out there, looking for a job, or struggling to make ends meet, is going to find these gems amidst the Goodwill racks, and it will give her a much needed thrill.  And on Easter Sunday, or at her next job interview, she is going to look radiant and proud.

Now, to be sure, there were also some real stinkers in that pile.  Like the sweater on top - one of my first knitted projects - a shrug that made me looked like a frilled lizard.  No I will not model it for you.

 I also....


(That *gasp-thud* sound is the simultanous cross-country reaction of my BFF, mother, and husband, who did not think it was possible for me to let go of this failure.)

This had a less noble motivation.  I just needed the storage for fabric so I could clean my office!! :)

I did keep back a few things to refashion, and will share the process with you when I do, of course!

So, head over to The SHINE Project and get motivated to bless someone with your clutter!


Photobucket


Pin It!

Friday, April 1, 2011

Ultimate Blog Party 2011!

Hey all!  I'm in a party mood, so I'm joining in the Ultimate Blog Party over at 5 Minutes for Mom

Ultimate Blog Party 2011

It's just a way for bloggers to get to know each other, share a little bit about themselves, and make friends!  So here's a little bit about why I started blogging:


I needed someone to talk crafty to, other than my poor husband, who only speaks engineer.

I like to share my harebrained ideas with the world.

I needed an occasional soapbox.

I have an etsy shop for my creative overflow and wanted a blog to go along with it.

I like show-and-tell.

I wanted to make new friends online!!  (It is hard for me to make friends in person.)


Here's what blogging is teaching me:


I don't have to be perfect to be liked.  (There is no chance I will be perfect, so this is a very good thing.)

Bloggers are overwhelmingly supportive of one another, even their direct competition.  I love that!!

Twitter isn't just for 14 year olds.

I really really need to take pictures and write things down when I'm creating things from scratch.

I don't have to blog every day or even every week to be a "success." 

There are so many cool people out there that I can't wait to get to know!


So head on over to the party at 5 Minutes for Mom and meet some other new bloggers!  And please leave a comment for me and for them - we bloggers LIVE for comments!!


Pin It!

Friday, March 11, 2011

hoodie upcycle part trois: camera strap cover!

I've been making camera strap covers for a while now.  I didn't invent them, I just put my own spin on them based on recommendations from my fabulous friend Jen, and adding my love of strip piecing.


Anyhoo, the camera strap covers have been a popular item, and I've sold the one off my camera 5 times.

Time to make another, one which I will NOT sell.

Beloved hoodie, thou hast new life. 


I think I may have stumbled onto greatness here.  There is NOTHING cushier on a neck than an old sweatshirt.


I added some cute raw-edge appliques and lined it with fusible fleece for even more padding.

 
Pardon the picture quality, but I had to use my phone for the pics.  Because I totally put this on my real camera as soon as it was done.  And it isn't coming off.
 
Well, unless someone wants to pay me $200 for it or something.
 
 
Pin It!

Friday, February 18, 2011

This just in: Boring hoodie transformed into cute makeup bag!


In spite of my compulsive Goodwill donations, I keep a box of old clothes to cut up for projects.  For some things, it's just wonderful to sew with fabric that is already perfectly broken in.  And sometimes an item is stained or un-donatable in some way, but a good source for scraps.

I loved this gray hoodie; I've probably had it for 10 years.  Haven't worn it in a long time, though; it just seems too short now.  (weight gain?  low rise jeans?  who knows.)  It needed a new life.


The beauty of refashioning zippered clothes is not having to sew in a zipper!  Wanna try it?  This is an easy project and won't take you long.


1.  With the zipper closed, cut the front out of the sweatshirt.  I only cut as far as the kangaroo pocket, but that's just me.  You can cut this to whatever size you like, as long as both sides are the same.  Using a pair of very small, sharp scissors, carefully cut between the teeth of the zipper.


2.  Use a safety pin at the bottom of the zipper to guard against accidentally opening it all the way.  You can hot glue the end of the zipper to make a new stop, or sew it shut.  I opted for glue.


3.  Cut two pieces of fusible fleece and two pieces of lining fabric the same size as your outer panels.  Fuse the fleece to the wrong sides of the outer panels.


4.  On your lining panel pieces, fold over the edge you will be attaching to the zipper and press.  I used a 3/8" seam allowance.


5.  Put the zipper foot on your machine.  Making sure your outer panels are out of the way, sew the folded edge of the lining panel to the underside of the zipper tape only.  Do this for both sides.


6.  Open the zipper 3/4 of the way (very important!)  With outer panels right sides together, sew around the edges.  Get as close as you can to the zipper without actually sewing over it.  Do the same with the lining panels, only use a 1/8" greater seam allowance, and leave several inches open on one side for turning. 

7.  Remove the safety pin.  Clip corners 45 degrees and trim seam allowances; turn right side out and press.  Stitch opening closed.


8.  Ta-da!  Your basic zip pouch.  Only...it's kinda boring.


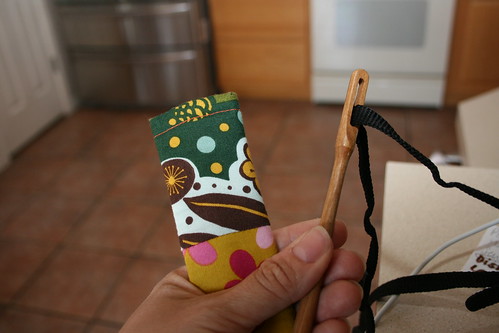
9.  Aaahhh, that's better!  I added a fabric flower with button embellishment, and used a piece of the hoodie tie as a zipper pull.

 Now I can enjoy my comfy old hoodie in its new life as a makeup bag!

Materials list:
old zip hoodie
fusible fleece
cotton lining fabric
zipper foot
fabric scraps for flower
button
cording from hoodie tie
thread and stuff

Linked up here:


Join  us Saturdays at tatertotsandjello.com for the weekend wrap 
 up           party!
 
also linked up at: DIY Home Sweet Home Project
Pin It!

Friday, August 27, 2010

the paint chip challenge!

I stumbled upon this challenge yesterday, and it got my mind working.  My eldest has a birthday in the fall, and we need to be thrifty with the party this year, so I am pondering an "art party."  This kiddo LOVES art projects, drawing, painting, play-doh, you name it.  She gets positively giddy over paint samples, so they would be perfect for the goody bags!


Supply list:

paint samples - the large single-color kind
cellophane bags
stickers, erasers, and other small goodies
pencil
hole punch
sharpie


I used Better Homes & Gardens paint samples from Wal-mart, which, due to incredible luck, fit perfectly into these 6" x 3.75" cellophane bags that I already had on hand.


Write your message on the paint sample, slide it into the baggie, and slide in a page of stickers facing the other way so you cover up the ugly backside of the sample.  Incidentally, I'm the world's WORST note-writer, so I try to say "thank you" in the goodie bags.  It's not how Emily Post would do it, but it's better than never getting around to it.

Now punch two holes in the top of the bag and slide a pencil through the holes.  Ta-da!  For only pennies you have a cute party favor!


We also picked up a few of the paint samples with the hole in them.  I think these make terrific gift tags!


This is a little bucket with holes already in the sides for tying a ribbon.  Full of art supplies, it would make another inexpensive yet fun gift for a creative kiddo!

By the way, immediately after these pictures were taken, the kids appropriated the paint samples for their own creative uses.  They will probably end up being placemats for the next stuffed animal tea party!

And don't tell my husband, but while I was at Wal-mart I picked up a few extra samples that would look nice on the living room wall...

Pin It!
Related Posts with Thumbnails